Sunday, August 17, 2014

Kitchen Remodel

The kitchen is basically done and we are enjoying our new space and happy to be out of our makeshift basement kitchen. The remodel did force us to use our grill a lot more, which was a plus, but you just can't grill and microwave everything!

Here are some BEFORE pictures of our white laminate cabinets and counters, laminate flooring, and weird soffits that we removed.


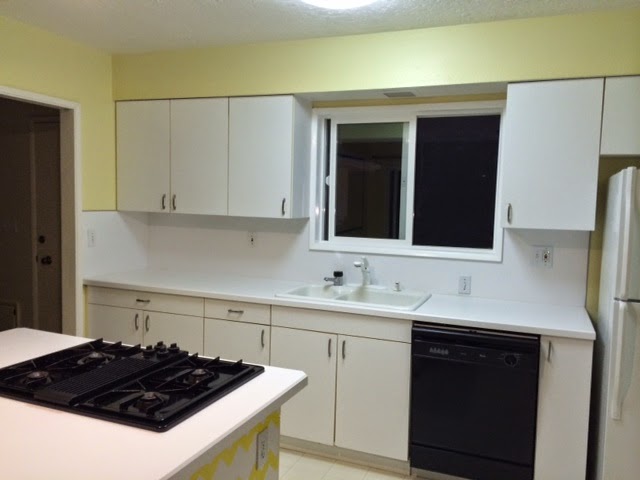
One thing I realized early on in the process is - demo is quick - building takes a LONG time.... The demo took about 2 days...the remainder almost 2 months.


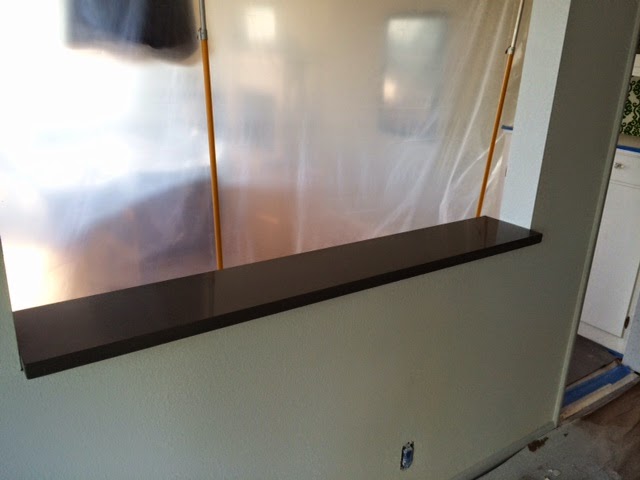
The first thing to go in was new can lights since we only had 2 lights in the cooking area previouslyNext they cut out a large "window" between our dining room and the kitchen. 


The floor was next. We opted for a 12"x24" tile that would not highlight our dog's long white fur (we actually laid her fur on various tiles when selecting) and every single crumb on the floor. Now - don't get me wrong - I like a clean kitchen- but it is just not practical to clean the floor daily!


Then the fun part - the cabinets! We spent a long time, ok - Kyle spent a long time, figuring out our cabinet design using IKEA's 3D design software. The software is great and really helps you figure out what will fit in your space and allows you to try different options, but it does not have everything. We went to IKEA 3 times to look at their demo kitchens, get ideas, talk to the kitchen designers, and figure everything out. Once we were ready to order, our kitchen designer was very helpful and made sure that we had all of the pieces that we needed. 


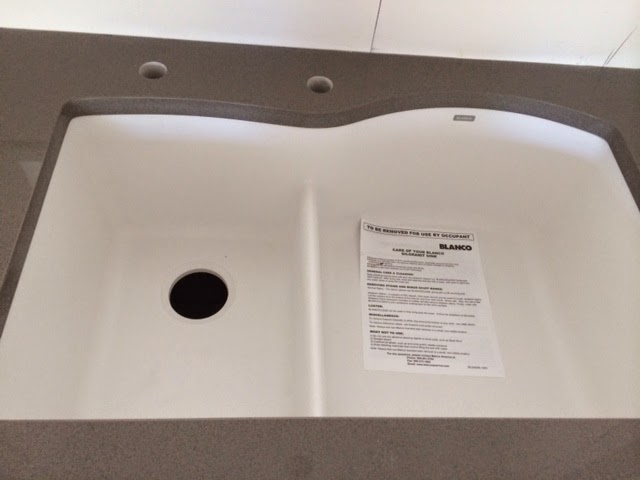
Once the lower cabinets were complete, the quartz countertop was installed and our silgranit sink. I really wanted a sink that would not show scratches, spaghetti sauce, and would not dent. Our old sink seemed to show everything and I am hopeful that this sink will hold up to some rough use.


Then it was time for the appliances. We were very excited to have a new fridge that was much larger than our old-school one and a new oven that was not from 1960. In order to squeeze the new larger fridge into our kitchen space, we opted to move the oven to the island and replace it with the new fridge. This also allows us to open the fridge door without hitting the garage door - which is a big plus!


Finally the finishing touches - drawer and cabinet hardware, a new kitchen light from Schoolhouse electric, and new pendant lights from Rejuvenation. We did not want to spent a fortune on pendant lights and really lucked out that we went during their huge summer clearance weekend. If you know me - you know I love a bargain - so I was beyond excited to get $115 light fixtures for $20. They also installed our new glass subway tile backsplash and bifold doors. 


Kyle and I are still debating the paint color...so that is the last arm wrestle to a finished kitchen. We are really enjoying the space and even Luna seems to love the remodel - especially the fridge cold water and ice dispenser. She is so spoiled!


Sunday, February 9, 2014

Cabin Fever Crafting!

I have been snowed in for 3 days now which means a serious case of cabin fever. Don't get me wrong - I love the snow, but I am ready for it to melt so that I can to the store - I am out of ice-cream!  In the meantime - it has been a fun weekend of crafting and blogging. 

Last month, my mom and I went to my favorite Portland home decor/vintage store called Grand Marketplace (http://grandmarketplacepdx.com). We picked up a few things and got the idea to make moss balls for a winter centerpiece. Off to Michaels to get various sizes of syrafoam balls, spanish moss, green moss, and more hot glue gun sticks. 

This was a really fun and fast craft. We also added pieces of lichen from our yards to give it more variety. 


I also found this fun test tube holder at Grand Marketplace. Given my Chemistry background, I could not resist. I added felt feet to the bottom and a few dried flowers, and found it a home on our living room desk.


When we were visiting family in WA for the holidays, we went to a fabulous store called Compass Rose (http://compassroseolympia.com/tacoma) where I got a new purse (always a sign of a good store) and found inspiration for a copy craft. They had these beautiful but expensive wool mountain pillows. I knew I could make one, so I got some wool suiting material at JoAnn's (50% off!) and made myself a pattern. Snowy mountain pillow for a snowy craft day.

Snow - love ya, but I am running out of craft supplies, so you can melt now!


Sunday, August 25, 2013

Summer Landscaping

We have really focused our efforts this summer on the backyard landscaping. Our project goals were: adding plants that will fill in, keep weeds out, attract butterflies and hummingbirds, and make our backyard a fun place to hang out.

My mom (garden master) has been a HUGE help giving us tips on plants and helping us with every project. We started with the far back bed where very old heather plants had taken over. 
BEFORE - old heather plants in the back of our yard
Replaced heather in the back with new shrubs, flowers, and grasses
Then we moved onto the terraced beds below our deck. There were lots of spring bulbs, and old lavender bushes,  but not much else. As we started clearing away old plants and vines, we realized that there was a large space below the deck where Luna or other animals could roam. We also found some old concrete half round dividers that we re-purposed in the terraces. Because of the opening beneath the deck, we added lattice and my Aunt Nancy helped with this project when she was in Portland visiting.
BEFORE - terraced area below deck with bulbs and OLD lavender
Terrace in progress...
Terrace Lattice under deck done!
New lavender plants on first tier with one of the re-purposed concrete dividers
New verbena, crawling rosemary, and lupine on second tier
New wooden trellis and ground cover to keep weeds at bay
We have a large landscape bed on the side of our house but it was mostly filled with spring blooming bulbs. In the summer it was barren and ended up full of weeds. My mom had the idea of adding height with a birdhouse and then using spreading shrubs, grasses, and perennial flowers to add life year round. 
Casting the 4x4 post in the ground for the birdhouse
New birdhouse with climbing clematis
New side yard plantings 
I also wanted a path to incorporate a "dry river" in our landscaping and a path in the back to add depth. We found beautiful green rocks and my mom and Aunt built the path using large slate tiles.


Our last project was to add a border between the pebbles and the lawn. Kyle was always shooting rocks when he mowed the lawn, so it was time to separate these two areas. Back to the rock store where we found long green/gray stones that gave the border a natural look. We dug a trench, added sand for leveling, and set the stones.  


It has been a fun summer of outdoor projects!